The Eave Detail That Fights Ice Dams
Ice dams aren't beaten by one product. They're held off by a layered detail at the eave — drip edge, ice barrier, and a cold, well-vented roof deck working together. Here's how the layers stack up.
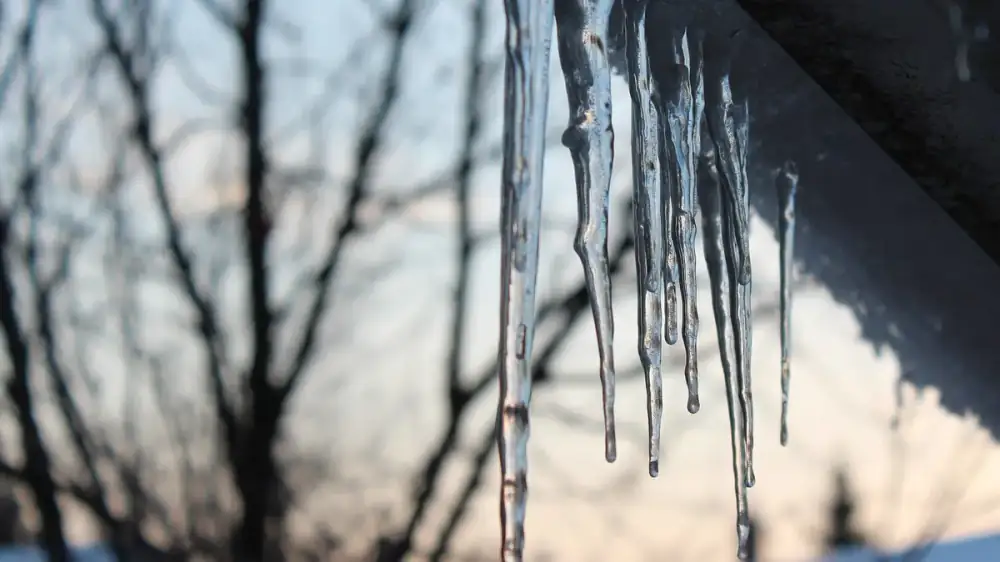
No single product beats ice dams. The eave is defended by three layers working together: a cold, well-ventilated roof deck that keeps snow from melting unevenly in the first place; an ice-and-water barrier under the shingles that blocks any backed-up meltwater from reaching the deck; and a drip edge lapped correctly with that barrier so water sheds off the edge, not behind it. Ventilation prevents the dam; the membrane and flashing contain the damage if one forms.
Every winter the same photos make the rounds — fat ridges of ice clamped to a roof edge, icicles hanging off the gutter like teeth, a brown ring blooming on a bedroom ceiling below. And every winter the same tidy promise follows: buy this heated cable, install that vent, roll out this membrane, and you're done. The promise is wrong, and understanding why it's wrong is the whole point. Ice dams don't surrender to a single product because they aren't a single problem. They're the visible result of a chain of events, and the eave defends against that chain with several layers, each responsible for one link. Beat the dam and you've beaten it with the stack, not with any one item in it.
Why the ice forms in the first place
Before the layers make sense, the mechanism has to. An ice dam is a temperature problem that becomes a water problem. Snow sits on the roof. Heat escaping from the house warms the deck up high, near the ridge, where the attic runs warmest. Snow melts against that warm deck and trickles down the slope — until it reaches the eave, which overhangs open air and stays cold, and there it refreezes. Repeat that over a few days and a ridge of ice builds at the edge. Now every new drop of meltwater ponds behind that ridge, and standing water at the edge has all the time it needs to creep back up under the shingles and find a way in.
The full sequence, with its many variations, is worth reading in how ice dams form at the roof edge. But the takeaway that organizes everything below is this: the dam is born from a warm roof and does its harm at the cold eave. That single fact tells you which layers matter and in what order they earn their keep.
The layer that keeps the dam from forming: a cold deck
The most important defense isn't a product at all. It's keeping the roof deck cold and even in temperature, so the snow on it doesn't melt unevenly and refreeze at the edge. Two things accomplish that together. Insulation and air-sealing stop household heat from reaching the attic in the first place, and ventilation flushes away whatever heat does sneak up there.
Ventilation is the half most bound up with the roof edge. When cool air enters low at the eaves and warm air exits high at the ridge, the attic stays near the outdoor temperature and the deck stays cold from edge to peak — the loop we cover in how roofline and attic ventilation work together. This is the genuine root-cause fix. And if the intake side is missing because your eaves are closed or lack soffits, the workarounds in ventilating a roof without soffit vents aren't a separate project — they're part of the ice-dam strategy itself. Get this layer right and dams may simply never form. Get it wrong and the other two spend every winter mopping up after it.
The layer that catches what gets through: the ice-and-water barrier
Now assume some brutal winter throws enough snow and cold at the roof that a dam forms anyway. This is where the ice-and-water barrier earns its place. It's a self-adhering membrane laid on the deck at the eave, under the shingles, that seals tightly around the roofing fasteners and creates a continuous waterproof plane. When meltwater backs up behind a dam and pushes under the shingles, this membrane is what stops it from reaching the wood deck and traveling inside.
Two things about it are widely misread. First, it does not prevent the dam — it manages the consequences of one that has already formed. Second, its coverage has to reach far enough up the slope to get past wherever water could back up, and that distance depends on pitch, overhang, and climate, so it's not a strip anyone should eyeball. Because it lives beneath the roofing, it goes on during roofing work rather than as a ground-level retrofit. Think of it as the layer that turns "a leak" into "no leak" after a dam has done its worst.
The layer that shows water the door: the drip edge
The smallest layer, and the one most often left out of ice-dam conversations, is the humble drip edge — and here everything hinges on the order the layers go in. At the eave, the ice-and-water barrier and the drip edge have to lap together so that water is always steered out over the metal and off the edge, never behind it. Lapped correctly, meltwater riding down the membrane meets the drip edge and sheds cleanly. Lapped wrong, that same water slips behind the metal and onto the fascia.
If you're hazy on what this piece even does, what a drip edge is and why it matters covers the fundamentals, and it belongs to the wider family of edge metals explained in roof edge flashing explained. In the ice-dam context, the drip edge is the final handoff — it makes sure the water the other two layers have controlled actually leaves the building instead of lingering at the edge.
Watching the three work as one
Picture the layers running in sequence through a thaw. Ventilation and insulation have kept most of the deck cold, so the melting is limited and even — most winters, the story ends right there. If a stubborn cold snap builds a dam anyway, the ice-and-water barrier under the shingles refuses to let the backed-up water reach the deck. And whatever water does run down the edge is shed cleanly, because the drip edge is lapped correctly over that barrier.
Pull any one layer and the whole thing weakens in a specific, predictable way. No ventilation, and dams form constantly, leaning on the membrane every single winter. No membrane, and the first dam to form leaks. No proper drip-edge lap, and water finds the fascia even when everything else is right. That's precisely why "which product stops ice dams?" is the wrong question — the answer is the stack, in order, not any single line item.
A few beliefs quietly sabotage this. Treating the membrane as prevention misreads its job; it contains damage, while a cold, vented deck does the preventing. Bolting on heat cables and declaring victory helps meltwater drain at specific trouble spots but does nothing about the warm attic driving the cycle. Improving insulation while ignoring ventilation — or the reverse — leaves half the cold-deck job undone; they're a pair. And blaming the shingles or the gutters points at the wrong suspect entirely, since the dam comes from attic heat, not the roofing material or the trough at the edge.
Why this one belongs to the pros
Notice where every layer of this detail actually lives: on the roof or in the attic. The membrane goes under the shingles, the drip-edge lap is set during roofing, and balancing ventilation means assessing the whole loop from intake to exhaust. None of that is a ladder-and-a-Saturday project, which makes ice-dam work firmly professional territory. It's worth calling a roofer or qualified contractor when you get recurring dams or icicles at the eave, when a thaw has left a ceiling stain, or when a re-roof is on the horizon and you want the eave detail built correctly while everything is open. A good one can tell you whether your real gap is ventilation, insulation, the membrane, the drip-edge lap, or some mix of them, and correct the layers in the right order. For how the eave works as one connected system year-round, see our roof edge overview.
Answers to common questions
Does ice-and-water shield stop ice dams?
Not exactly — it limits the damage rather than preventing the dam. The membrane at the eave seals around fasteners and blocks meltwater that backs up under the shingles from reaching the roof deck. But the dam still forms. Actually preventing dams is the job of a cold, well-ventilated roof deck. The membrane is your last line of defense once water has already backed up.
What role does the drip edge play with ice dams?
The drip edge and the ice-and-water barrier have to lap together correctly at the eave so meltwater is directed over the metal and off the edge rather than behind it. If the layering is wrong, water backing up from a dam can find a path onto the fascia or deck. The drip edge is a small part of the detail, but the order in which it laps with the membrane matters.
Why is ventilation the real ice-dam fix?
Because ice dams start with a warm roof. When heat escapes into the attic and warms the deck, snow melts up high, runs to the cold eave, and refreezes. Keeping the attic and deck cold with balanced intake and exhaust ventilation makes the whole roof melt evenly, so water drains instead of refreezing at the edge. Ventilation and insulation attack the cause; the other layers manage the symptom.
How far up the roof should the ice barrier go?
The membrane needs to extend from the eave far enough up-slope to cover past the point where a dam could back water up — which depends on roof pitch, overhang and climate. Because the correct coverage varies and it's installed under the roofing, this is determined and applied during roofing work by a professional rather than estimated from the ground.
Can I add ice-dam protection to my existing roof?
The membrane layer goes on under the shingles, so adding it usually means it's done during a re-roof rather than as a standalone retrofit. Ventilation improvements can sometimes be made separately, and insulation and air-sealing in the attic can be improved on their own. A roofer can tell you which parts of the detail can be improved without a full tear-off.
More from this section
How Gutters Damage Fascia When They Overflow
Overflow sends water onto and behind the fascia, rotting the board and loosening hangers — then the gutter sags and overflows more. Here's the cascade and how to stop it.
Signs Soffits Have Moisture Damage
Staining, sagging, peeling paint, pests and mold under the eaves all signal soffit moisture damage. Here's what causes it and when to call a pro.
Water Stains Below the Roof Edge
Stains under the eave are a map of misdirected water — overflow, water behind the gutter, drip edge trouble, ice dams or condensation. Here's how to read them.