How to Remove Algae from Exterior Walls
Green algae on a wall is a moisture problem wearing a green coat. Removing it is straightforward — but doing it gently, and keeping it from coming back, takes a little more thought.
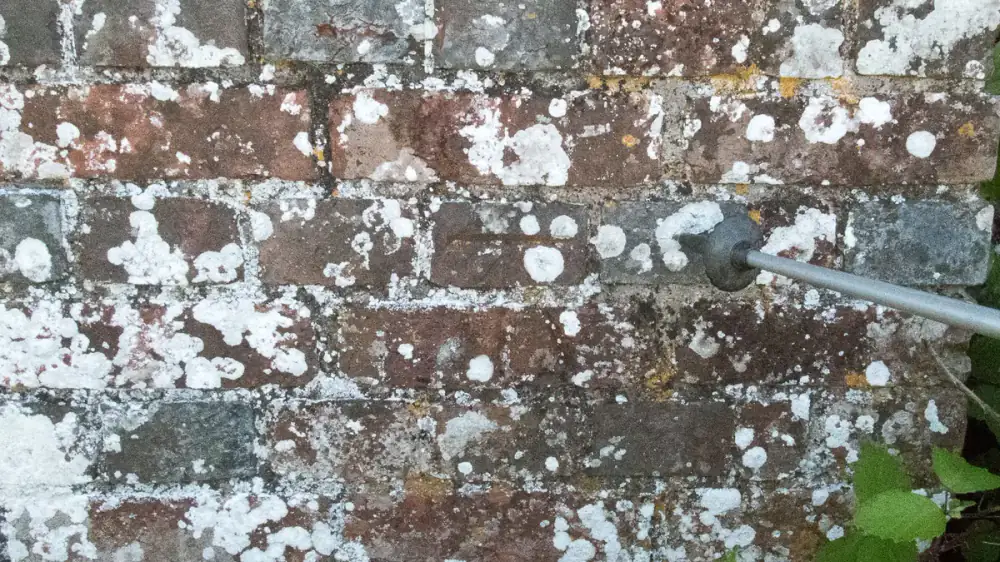
Remove algae with a gentle, chemistry-first approach, not brute force. Rinse the wall, apply a cleaning solution suited to the surface and follow its instructions, let it work, then rinse gently — protecting nearby plants and windows throughout. Blasting algae with high pressure risks damaging the wall and usually just spreads the growth so it returns. The lasting fix is addressing the shade and moisture that let it grow in the first place.
The green tinge spreading across the shaded side of a house looks like dirt and behaves like nothing of the sort. It's a colony — algae — and its presence is a small diagnosis of that particular wall: it stays damp, it sees little sun, and it carries a thin organic film for the algae to eat. You can scrub it off in an afternoon. But unless you read what it's telling you, you'll be scrubbing the same spot again next season, which is why removing algae well is really two jobs — the cleaning, and the prevention that makes the cleaning stick.
Read it as a symptom before you clean it
Algae is opportunistic rather than dirty, and it needs three conditions lined up before it takes hold on a surface. The first is moisture — walls that stay damp are the single biggest factor, whether the water comes from overflowing gutters, splashback off the ground, dripping trees or poor drainage that keeps a surface wet longer than it should be. The second is shade and low airflow: north-facing walls and tucked-away corners dry slowly, and without direct sun to bake off the spores, they linger and grow. The third is food — the fine layer of pollen, dust and organic matter that settles on every exterior surface is exactly what the algae feeds on.
What's revealing is what's not on that list: dirtiness in the ordinary sense. That's why scrubbing harder does so little. You're not fighting grime, you're fighting biology, and biology comes back whenever the conditions invite it. Overflowing gutters are one of the most common hidden moisture sources feeding that biology, which is why keeping them clear matters more than most people expect — our guide on why water runs behind gutters explains one frequent culprit.
Why force is the wrong instinct
The reflex is to point a pressure washer at the green and blast it into memory. It's the wrong reflex, for two separate reasons.
The first is that high pressure can damage the wall itself. On siding it can crack panels, strip paint and drive water behind the surface into the wall assembly — our article on whether pressure washing can damage siding walks through exactly how that unfolds. The second is that blasting doesn't even accomplish what you're after: force scatters the visible film but leaves the roots and spores in place, so the algae regrows, often faster, because the surface is now wetter than before. Algae is a chemistry problem, and it yields to a cleaning solution far more readily than to force. Soft washing captures the better idea — a solution applied at low pressure does the actual work, and a gentle rinse carries the dead growth away. For the full contrast, see pressure washing vs soft washing.
Working through it safely
Keep the method general and cautious; the exact product and dilution depend on your surface and the solution you choose, so let the product's own instructions lead the way rather than any generic recipe.
- Prep the area first. Move furniture and anything you'd rather not splash. Wet down nearby plants, shrubs and soil thoroughly, and cover what you can — a well-hydrated plant shrugs off cleaning runoff far better than a dry, thirsty one.
- Rinse the wall. A gentle pre-rinse with a garden hose clears loose debris and dampens the surface so the cleaner spreads evenly instead of soaking straight in.
- Apply a suitable cleaning solution. Choose a product labeled for your surface and follow its dilution, dwell time and safety instructions exactly. Work bottom to top to avoid streaking, and keep the surface wet with the solution long enough for the chemistry to work — never let it dry on the wall.
- Let it do the work. Resist the urge to scrub. Give the solution the time its label specifies; light agitation with a soft brush is all a stubborn patch usually needs.
- Rinse gently. Rinse top to bottom at low pressure, then rinse the surrounding plants and ground a second time to dilute any runoff.
One caution runs underneath all of it: if any part of this needs a ladder or working overhead, stop and rethink. Spraying or reaching above your head from a ladder is where these jobs turn genuinely dangerous, and no wall is worth a fall.
Guarding everything that isn't the wall
The cleaning solution is the part of the job that demands the most care, because it doesn't distinguish between algae and the things you value nearby. Plants and lawn come first: wet them before you start, cover what you can, and rinse the area afterward — dilution is your ally throughout. Windows and glass deserve attention too, since some solutions can leave residue or etch a pane; keep them rinsed and never let cleaner dry on the glass. Metal fixtures, light fittings and finishes should be protected or rinsed if the solution might discolor or corrode them. And be mindful of where the runoff ends up — apply and contain the solution responsibly per the product guidance, so it doesn't pour straight into storm drains and waterways.
Making it the last time — or close to it
Here's the part most people skip, and it's the reason the green keeps coming back. Cleaning removes the growth; it does nothing to the conditions that invited the growth. Leave the wall shaded and damp, and new algae simply moves into the vacancy. Real prevention goes after the moisture and the shade directly. Trim back the branches and shrubs that shade the wall and keep it from drying — more sun and airflow is the single most effective deterrent there is. Fix overflowing or leaking gutters so runoff isn't constantly wetting the wall; clogged gutters are a frequent, overlooked cause, and our guide on how often gutters should be cleaned can help you set a schedule. Improve drainage at the base of the wall so splashback and standing water stop keeping the lower courses damp. And address anything that drips or holds moisture against the surface, from a downspout discharging too close to the wall to dense plantings pressed right up against it.
Watching how and where the growth behaves tells you whether you've solved it or just delayed it. Green that spreads fastest on shaded, north-facing walls confirms moisture and low light are driving it. Growth clustered under gutters or downspouts points to an overflow or drainage fault behind it. A soft, spongy or discolored surface beneath the growth can mean moisture has sat long enough to affect the material itself. Algae returning within weeks means nothing about the conditions has actually changed — and mold, moss or a musty smell joining it signals the dampness runs deeper than the surface. For a closer look at that recurring-growth problem specifically, see why green growth keeps returning on siding. If the growth sits on an upper story or out of safe reach, if it's widespread or stubborn, if you're unsure which solution suits your surface, or if it keeps coming back despite your efforts, that's the point to bring in a professional — someone who can both clean safely at height and help track down the moisture source that's really feeding it.
Frequently asked questions
What causes green algae on exterior walls?
Algae needs three things: moisture, low light, and something organic to feed on. Walls that stay damp — north-facing sides, shaded corners, spots under overflowing gutters or dripping trees — give it exactly that. The green film is usually algae feeding on the thin layer of pollen, dust and organic film that settles on any exterior surface.
Can I just pressure wash algae off?
You can knock the visible film off with pressure, but it's usually the wrong tool. High pressure can crack or gouge the surface and drive water behind siding, and because it leaves the growth's roots behind, the algae often returns quickly. A gentle cleaning solution applied at low pressure treats the growth itself rather than just scattering it.
Will bleach or a cleaning product harm my plants?
Many cleaning solutions can harm nearby plants if used carelessly. The safest habit is to wet down surrounding plants and soil before you start, cover what you can, follow the product's own dilution and safety instructions, and rinse the area well afterward. When in doubt, choose a product labeled for exterior surfaces and follow its guidance exactly.
Why does algae keep coming back after I clean it?
Because cleaning treats the symptom, not the cause. If the wall stays shaded and damp, new growth simply moves back in. Lasting results come from addressing the moisture and shade — trimming back branches, fixing overflowing gutters, and improving airflow — not just repeating the cleaning. Our article on why green growth keeps returning on siding covers this in detail.
Is algae actually damaging my wall?
On its own, a thin film of algae is more of a cosmetic and moisture-holding nuisance than an immediate threat. But it keeps the surface damp, which over time can degrade finishes and encourage other growth like moss or mildew. The moisture that feeds it is often the real problem worth tracking down.
When should I call a professional?
Call a pro when the growth is on an upper story or otherwise out of safe reach, when it's widespread or stubborn, when you're unsure what cleaning solution suits your surface, or when the algae keeps returning despite your efforts — a sign the underlying moisture problem needs attention.
Related reading

Pressure Washing vs Soft Washing
One relies on force, the other on cleaning solution at low pressure. Matching the method to the surface is what protects siding, roofs and trim.
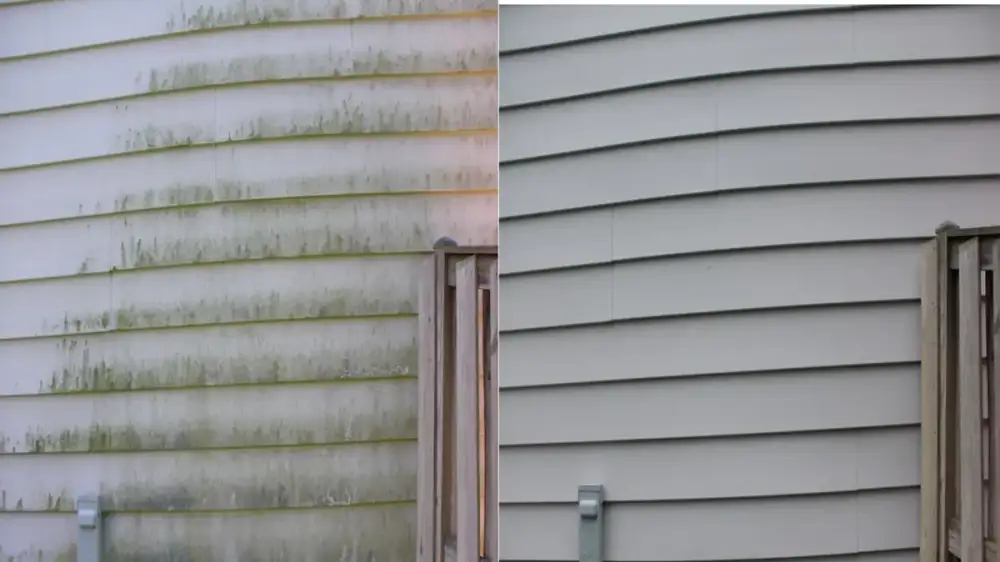
Can Pressure Washing Damage Siding?
The same force that strips dirt can crack panels, peel paint and push water into the wall. Here's how siding gets damaged — and the safer way to clean it.

How to Remove Black Streaks and Mildew from Exterior Walls
Black streaks and mildew are living growth, not dirt — which is why they resist a hose and return. Soft washing treats them; managing moisture keeps them away.